 An autoclave is used to sterilize equipment and media.
 Autoclave Use
Background Information
An autoclave is used to sterilize equipment and media.
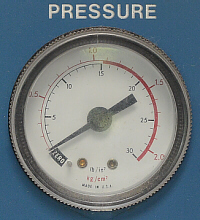
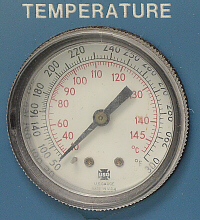
Louis Pasteur showed that once sterility of a medium is achieved, that medium will remain sterile (steril = barren) until contaminated by microorganisms (micro = small). Sterilization by heating is one of the most convenient methods, but may not be effective at the temperature of boiling water (100° C) because many spores can survive at this temperature. However, in a pressure cooker, where the pressure is 15 lb. (1 atmosphere) above normal atmospheric pressure, water boils at 121° C, and all life forms are killed in 15 min. or less. Thus, the standard conditions for sterilizing apparatus or small volumes of liquid is to treat them with steam at 15 lb. of pressure for 15 min.
An autoclave (auto = self; clavi = key, in reference to the fact that it is self-locking due to the pressure built up) is an automated pressure cooker in which the conditions inside are thermostatically controlled. When the autoclave's timer is set for 15 min., the autoclave first heats until 121° C is achieved, then the light goes on and the timer starts. The pressure and temperature are maintained for the selected time. At the end of the cycle, the pressure is gradually released, and the door cannot be opened until the pressure reaches zero again. Thus, the 15 min. heating time actually takes 30 to 45 min. to accomplish.
Safety Considerations
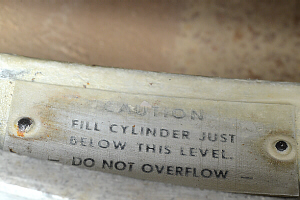
Make sure that lids on any containers placed in the autoclave are loose enough to allow the pressure inside and outside the container to equalize as the temperature increases. If lids are on tightly and pressure cannot equalize as the autoclave heats up, you risk having those containers implode. Also, make sure that the placement of items in the autoclave will not interfere with operation of the door.
Do not try to force the door open before the pressure has dropped all the way to zero. If the pressure is still high enough, you wont be able to open the door. If the pressure is still elevated somewhat but low enough to allow the door to be opened, you run the risk of having extremely hot steam being forcibly blown at you as the pressure is released. Also, if you have just autoclaved liquids, the sudden drop in pressure can cause those liquids to start boiling vigorously enough to overflow their containers.
Even if the pressure has dropped all the way to zero, you need to be extremely careful when opening the door of the autoclave. Stand well back from the door, and especially make sure your face is not close enough to get scalded. Wear heat-proof gloves to help protect your hands and arms. First, slowly release just the latch on the door so the initial burst of steam is released slowly and goes straight up rather than out toward you. Once that steam has been released, then carefully open the door.
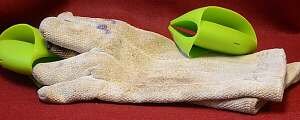 Use caution when reaching into the hot autoclave to remove
articles. Wear heat-resistant gloves because the items youll be handling
will be extremely hot. Be very careful that your unprotected arms dont
come into contact with the hot doorway or sides of the autoclave as you
remove articles from it.
Use caution when reaching into the hot autoclave to remove
articles. Wear heat-resistant gloves because the items youll be handling
will be extremely hot. Be very careful that your unprotected arms dont
come into contact with the hot doorway or sides of the autoclave as you
remove articles from it.
Make sure that lids are on securely-enough to not fall off any containers, but loosly-enough for pressure-equalization before you remove those containers from the autoclave. Note that if taller containers have been placed behind the position of the open door, you may need to carefully tip them slightly to get them past the door. Be careful that you dont tip containers of liquids so far that the liquid spills out of the container. Heat-resistant gloves rapidly become non-heat-resistant and extremely uncomfortable if/when soaked with hot liquids, not to mention that you could scald your hands.
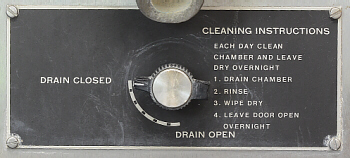
Regulations and requirements on autoclaving and disposal of contaminated media (used petri dishes with cultures growing on them) keep changing (and have changed numerous times since this protocol was written), so check first with the Lab Manager, before attempting to autoclave any cultures, etc. that are no longer needed.
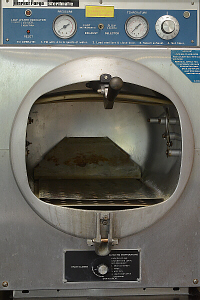
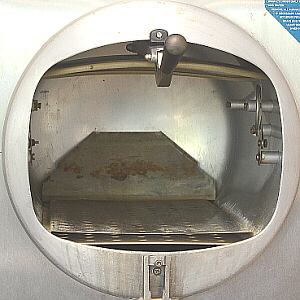
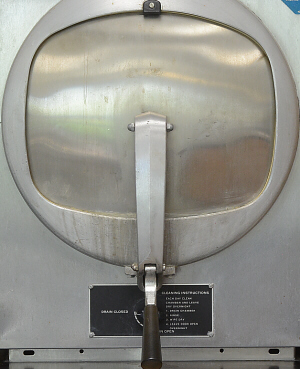
Parts of the Autoclave
 Illustrate the autoclave, labeling the following parts:


Use of the Autoclave
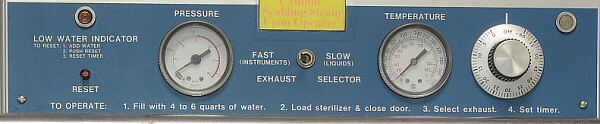
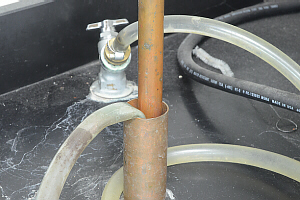 Select the appropriate exhaust:
slow for water-containing materials or fast for apparatus. If you have
a mixture of wet and dry things to autoclave, set the exhaust on
slow. This controls how quickly the steam is released and the pressure
decreased after autoclaving is finished. If you remember PV=nRT-related
topics from chemistry, the boiling point of a liquid is dependent on pressure
as well as temperature. If you autoclave liquids, you are heating them higher
than their normal boiling point, but doing so under pressure, so they dont
boil. If the pressure is released too quickly, they will begin to boil,
vigorously, and at least partially, boil out of their container. However,
if the pressure is slowly released so the liquids have time to adjust,
boiling will be kept to a minimum.
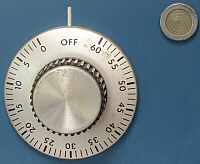
Set the time of treatment
(15 min. for small volumes of liquid (this is what we use for almost everything
we autoclave), 30 min. for volumes over 1 L, or 60 min. for volumes over a
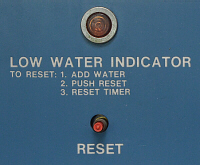
gallon). Note that the timer light doesnt go on until the autoclave reaches
the proper temperature and pressure. Also, if at any time during the process,
the pressure/temperature drop, the timer will stop timing until the autoclave
has built up proper pressure/temperature, again. Thus, autoclaving something
for 15 min. often takes about 45 min.
Remove hot items with the aid of
heat-resistant gloves. Watch that your arms dont touch the hot sides of
the autoclave. If the lids have popped off any bottles or test tubes,
immediately replace them (without touching the inside) while the contents
of the bottle or test tube are still hot enough to remain sterile.
Typically, due to all the changes in disposal regulations, we have to use
plastic, disposable petri dishes, but if used glass petri dishes have been
autoclaved, immediately pour out any used agar while it is still liquid (ask
the Lab Manager where to put it) and rinse the used glass containers,
dishpans, etc., in hot water (When glass petri dishes have been cleaned and
are dry, they may be returned to a metal canister and sterilized.
Regulations on disposal of used plastic petri dishes keep changing, so
check with the Lab Manager first (before you run the autoclave) for current
regulations.
Select the appropriate exhaust:
slow for water-containing materials or fast for apparatus. If you have
a mixture of wet and dry things to autoclave, set the exhaust on
slow. This controls how quickly the steam is released and the pressure
decreased after autoclaving is finished. If you remember PV=nRT-related
topics from chemistry, the boiling point of a liquid is dependent on pressure
as well as temperature. If you autoclave liquids, you are heating them higher
than their normal boiling point, but doing so under pressure, so they dont
boil. If the pressure is released too quickly, they will begin to boil,
vigorously, and at least partially, boil out of their container. However,
if the pressure is slowly released so the liquids have time to adjust,
boiling will be kept to a minimum.
Set the time of treatment
(15 min. for small volumes of liquid (this is what we use for almost everything
we autoclave), 30 min. for volumes over 1 L, or 60 min. for volumes over a
gallon). Note that the timer light doesnt go on until the autoclave reaches
the proper temperature and pressure. Also, if at any time during the process,
the pressure/temperature drop, the timer will stop timing until the autoclave
has built up proper pressure/temperature, again. Thus, autoclaving something
for 15 min. often takes about 45 min.
Remove hot items with the aid of
heat-resistant gloves. Watch that your arms dont touch the hot sides of
the autoclave. If the lids have popped off any bottles or test tubes,
immediately replace them (without touching the inside) while the contents
of the bottle or test tube are still hot enough to remain sterile.
Typically, due to all the changes in disposal regulations, we have to use
plastic, disposable petri dishes, but if used glass petri dishes have been
autoclaved, immediately pour out any used agar while it is still liquid (ask
the Lab Manager where to put it) and rinse the used glass containers,
dishpans, etc., in hot water (When glass petri dishes have been cleaned and
are dry, they may be returned to a metal canister and sterilized.
Regulations on disposal of used plastic petri dishes keep changing, so
check with the Lab Manager first (before you run the autoclave) for current
regulations. Use of Autoclave Tape
 Autoclave tape looks like masking tape with white lines on
it. These white lines are sensitive to conditions in the autoclave and
change to black when properly treated. Thus, canisters of pipets or petri
dishes, bottles of medium, and/or packages of wrapped equipment (especially
if any of these items are to be stored for a period of time before use) can
have a SMALL piece of autoclave tape placed across their lids prior to
autoclaving. When the container is removed from the autoclave, the tape is
dated. By placing the tape across the lid of a container, it seals the
container (in that it is a sign that the container has been unopened and is
sterile inside), and if the seal is broken (if the tape has been torn or
removed), that is an indication the container has been opened and the
contents may no longer be sterile.
Autoclave tape looks like masking tape with white lines on
it. These white lines are sensitive to conditions in the autoclave and
change to black when properly treated. Thus, canisters of pipets or petri
dishes, bottles of medium, and/or packages of wrapped equipment (especially
if any of these items are to be stored for a period of time before use) can
have a SMALL piece of autoclave tape placed across their lids prior to
autoclaving. When the container is removed from the autoclave, the tape is
dated. By placing the tape across the lid of a container, it seals the
container (in that it is a sign that the container has been unopened and is
sterile inside), and if the seal is broken (if the tape has been torn or
removed), that is an indication the container has been opened and the
contents may no longer be sterile.
Other Things to Include in Your Notebook
Make sure you have all of the following in your lab notebook: